If you want to perform auto air conditioning recharging all by yourself, you’re required to have a charging kit, refrigerant, and some practical knowledge. Manufacturer’s specifications and a charging manifold with gauges are necessary for a professional job. Charging kits are available at stores and auto parts retailers, you can go and have a look there. Search for one that includes a pressure gauge, this will greatly make your work easier. Read the following steps to see how it is can be done.
Steps
1. Determine if you have any refrigerant left in your system at all. To do this, you will need to fit a charging hose on the low pressure port, discussed later. Be sure to use eye protection. If your system is completely discharged, it may be contaminated with moisture, and charging will not give satisfactory results unless the source of the leak is found, repaired and the receiver dryer replaced. The open system must be repaired and purged using a vacuum pump to remove air and moisture. You will also want to add compressor oil if the system has been leaking. Evidence of oil leakage and measurement of oil left in a replaced compressor will be a guide as to how much oil to replace.
2. Check for any obvious leaks. If your system has lost sufficient refrigerant to quit working, you have a leak. Small leaks may take months to deplete the refrigerant so that the AC fails to cool, but charging a system with a significant leak is simply a waste of time. Look for refrigerant oil residue on hose, tubing, and fittings that are part of the refrigerant system. Spray a soapy water solution on fittings and watch for bubbles to appear, indicating a leak.
3. Make sure the condensing coils are not obstructed with debris, and that the compressor is operating. To test a compressor with a low charge you may need to jump the pressure switch, often located on the accumulator.
4. Tap your refrigerant can. This is done by opening the valve on the tapping fitting completely open, which retracts the tapping pin into the valve body. Failing to do so will result in the tap puncturing the can when it is installed, releasing the refrigerant before the fitting is sealed.
5. Securely thread the tapping valve on the refrigerant can, close the valve completely shut. This drives the pin into the top of the can, making it possible to release the refrigerant when the valve is opened.
6. Purge the charging hose by opening the valve until you hear it fill with refrigerant, then slowly loosening the brass fitting that connects the hose to the valve. Be careful not to allow refrigerant to spray on bare skin, as this will freeze skin tissue on contact. Re-tighten the hose once you have heard refrigerant escaping, this should have forced any air (and moisture) from the hose.
7. Locate the low pressure charging port on the refrigerant line on your car. This will be on the larger tube, usually near or on the accumulator. Connect the quick coupling and make sure it is not leaking.
8. Crank your engine and turn the AC on high cool, high fan. If your recharging hose is equipped with a pressure gauge, check it to determine if the system needs refrigerant. If the pressure holds steady in the recommended range, the system is full and should not be charged. If the pressure is below the recommended range, follow the instructions to recharge the system. Another indicator that the system needs refrigerant is that the compressor cycles rapidly. If the compressor switches on and off every 5 to 20 seconds, it is most likely due to low pressure. You will see the pressure drop when the compressor kicks on, the compressor will shut off when the pressure gets too low, and the pressure rises back up to the operating range as the system equalizes. Compressor cycling (switching on and off) in a completely charged system should be very slow (every 30 seconds or up) or not at all present (compressor stays on) in hot weather.
9. Open the valve until you hear refrigerant passing through the hose.
10. Allow the can to dispense its contents. This often takes anywhere from two to five minutes. The hotter the outside temperature, the more quickly the contents will discharge. Keep the can with the tap up at all times, to allow non-liquid refrigerant into the suction side of the system to prevent compressor damage. Do not overcharge! A manifold gauge should be used to measure both high and low side pressure. Consult a Pressure temperature chart.
11. Close the valve and disconnect the hose when the can is empty or no longer discharging enough to keep the can cold. Check the charging port for leaks, and replace the plastic cap.
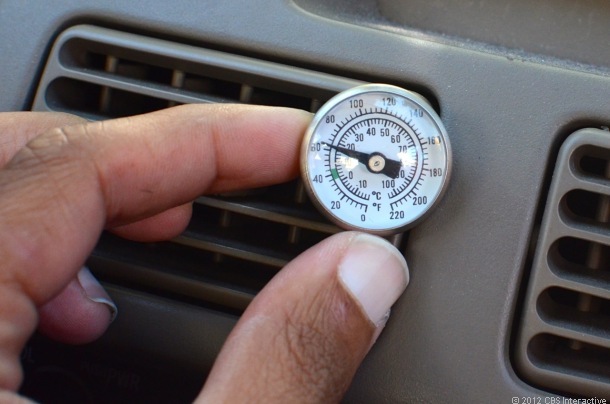
12. Check the air from the AC vents in the car. It should be blowing cold (38-45 degrees), if not, either one can of refrigerant was not sufficient to charge the system, or some other component is the problem. Do not overcharge! A manifold gauge should be used to measure both high and low side pressure. Consult a Pressure temperature chart.
Can I successfully recharge the air conditioner in my car?
by
Tags: