he first step is to get the engine warmed up to operating temperature. This insures that the oxygen sensor will generate voltage. You will need a high-impedance DC voltmeter to measure the output voltage. It would be good if you use a high quality or digital voltmeter. Now, attach the positive lead of the voltmeter to the oxygen sensor output wire. This wire should remain connected to the harness going to the computer, so you may find it necessary to use a jumper or trim back the insulation so you can attach the leads.
Connect the negative lead to a good engine ground, such as the engine block, or any bare metal on the vehicle’s chassis. Now, set the voltmeter to look for 1 volt DC. When you turn the key on, do not start the engine. You should see a change in voltage on the meter in most late model cars. If not, check the connections.
Now start the engine. In the case of single wire sensors, you should run the engine above 2000 rpm for a few minutes to heat up the O2 sensor and try to get into closed loop. The sensor showing several cross counts per second indicates closed loop operation. It may help to rev the engine between idle and about 3000 rpm several times. The computer will recognize the sensor as hot and active once there are several cross counts. You are looking for voltage to go above and below 0.45 volts. If you see less than 0.2 and more than 0.7 volts and the value changes rapidly, you are through, your sensor is good. If not, is it steady high, near 0.45 or steady low?
If the voltage is near the middle, you may not be hot yet. Run the engine above 2000 rpm again. If the voltage is steady high, create a vacuum leak. Try pulling the PCV valve out of its hose or remove the oil filler cap and letting air enter. You can also use the power brake vacuum supply hose. If this drives the voltage to 0.2 to 0.3 or less and you can control it at will by opening and closing the vacuum leak, the sensor is usually good.
If you are not able to make a change either way, stop the engine, unhook the sensor wire from the computer harness, and reattach your voltmeter to the sensor output wire. Repeat the rich and lean steps. If you can’t get the sensor voltage to change, and you have a good sensor and ground connection, try heating it once more. Repeat the rich and lean steps. If still no voltage or fixed voltage, you have a bad sensor.
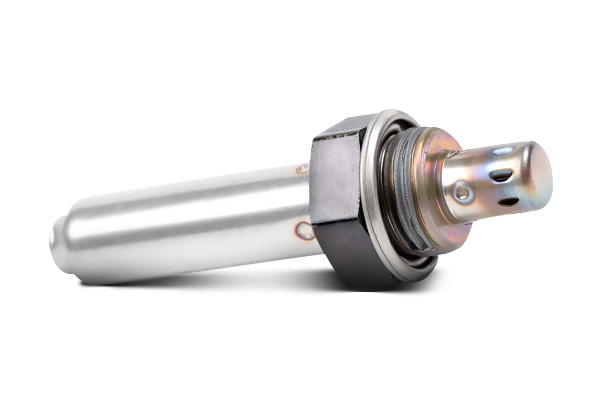
Testing 1 wire oxygen sensors:
These are the easiest to test, because this kind of oxygen sensor generates electrical current once it reaches its operating temperature, this current is read by the engine control computer and makes the needed changes to the fuel mixture.
Testing 2 wire oxygen sensor
An oxygen sensor with two wires has a heating element to ensure that the oxygen sensor starts working faster instead of waiting to get heated by the exhaust temperature like the single wire design.
In this type of oxygen sensor, one wire is still the signal wire, the second wire will have a constant 12 volt signal coming from the engine control computer, this 12 volt current is used to heat the heating element inside the O2 sensor, the casing of the oxygen sensor is used as a ground for the heating element in this design.
Testing a 3 wire Oxygen sensor:
This sensor is similar to the two wire design; the difference is that instead of using the body of the O2 sensor as a ground, the third wire is the ground, eliminating the potential of poor ground between the O2 sensor and the exhaust system making it more efficient.
Testing a 4 wire oxygen sensor:
This type of sensor outperforms all other three, because you have a constant twelve volt signal and constant ground for the heating element coming from the engine control computer, and to make the signal more accurate, instead of waiting for the O2 sensor to generate its own current, the computer sends a signal to the O2 sensor, and depending on the oxygen content in the exhaust gases exiting the engine through the exhaust system, it sends a signal back to the engine control computer through its fourth wire.
IMPORTANT INFORMATION:
When you read the engine trouble codes that say for instance:
O2 sensor high
O2 sensor low
Or similar codes that tell you that the oxygen sensor is either rich or lean, don’t replace the sensor till you test it as we just described above, remember:
The oxygen sensor doesn’t know why the oxygen content is either high or low; its job is to report the oxygen content, not to diagnose why the oxygen content is either high or low.
For instance:
When you have a bad spark plug, spark plug wire etc. It will cause the fuel mixture to exit the cylinder unburned, the oxygen content in the exhaust system increases, the O2 sensor sends the signal to the computer and the computer changes the signal to the fuel injectors to stay open longer because the engine is running lean!!!, you know that the engine is not running lean, you have a cylinder that is causing unburned mixture, and that is read as high oxygen content by the exhaust system.
Second example:
When a fuel pump starts loosing fuel pressure, it no longer keeps up with the demands of the engine causing a lean condition, in this case the O2 sensor will read low most of the time, and is not because the oxygen sensor is bad, but because you have low fuel pressure.
The oxygen sensor is the item in a vehicle that gets replaced a lot of times for no reason, and that is because when the codes say “oxygen sensor problem”, they go ahead and replace the O2 sensor without testing it first, the end result is a problem that remains unsolved, and an unnecessary new O2 sensor installed on the vehicle.
How can you test the oxygen sensor?
by
Tags: