It’s a horrible, sinking feeling to walk out to your vehicle and see a pile of broken glass next to the door. No matter what the cause is- whether corroded parts, loose weather stripping, an accident, or an act of vandalism-it is inconvenient and replacing the broken windows is a task that drivers typically want to do as soon as possible. This is especially the case during the winter time. However, car window replacement can be costly. You’ll have to pay for the window and the time of a professional glass company to install it. a DIY is always a good choice if you want to save your budget with some basic hand tools.
At the very start, clean up the small glass pieces that scatter around. Grab a powerful shop vacuum and clean the entire interior even if it doesn’t seem necessary; glass will be in places that don’t make any sense.
Of course, you need to buy a new one to replace the broken car window. You can buy one from an auto parts shop, from a glass shop or online. Shop around for the best price. But before you make a decision, make sure that the new one fits in the make, model and year of your vehicle. Otherwise, you may be stuck with an incorrect one.
Then remove the inner door panel according to the directions in your vehicle’s repair manual. Peel back the plastic vapor-barrier sheet carefully. Wear gloves when removing the glass. Make sure all glass is removed. Before you remove the glass, disconnect anything else in the door, such as speakers. Get any other objects out of the way of the pane.
To make your installation easier, remove the seal at the bottom of the window to open up the slot the glass panel needs to fit through and free one of the window tracks for fore-and-aft play.
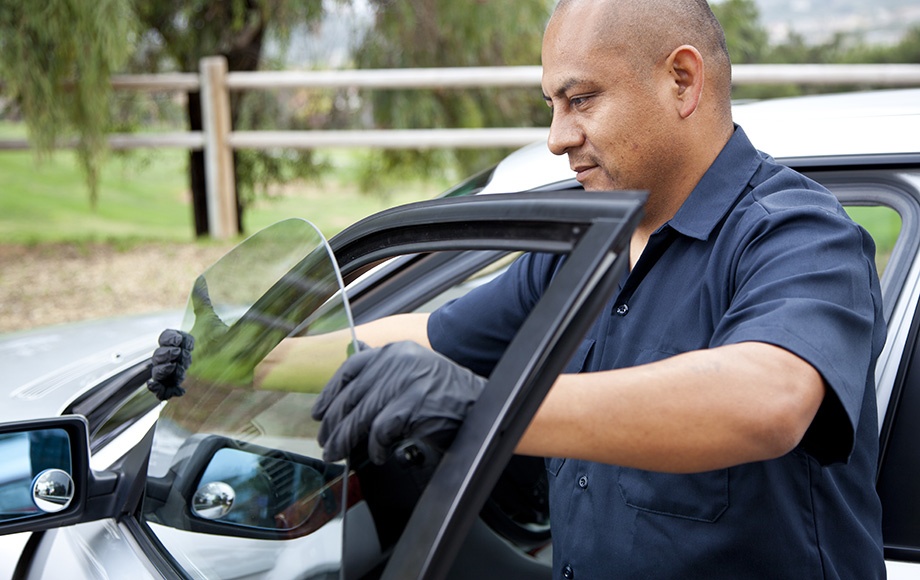
Before installing the replacement, wash it. This removes particles or other debris to prevent it from getting into the seals and functioning parts of the door panel interior. Then you can wriggle the new glass into place. Drop the shorter side in first at a near-90-degree angle and try to catch the long side of the glass in its track, after that, rotate the short side up. With a few tries the glass will slip into place.
Place the bracket back and align the clips that are attached to the glass. Then run the new glass up and down to ensure that the motion is satisfactory. If it operates properly, tighten down the bracket bolts. Next, replace the weather-stripping and barrier sheet. The remainder of the work: Put the door together in reverse order, making sure to align the window crank, if necessary.
Here are several pieces of advice you can take to facilitate your work:
1. Screws and clips that hold the door together are not so easily to be found, they can be hidden in places you wouldn’t normally look.
2. Use a trim-removal tool, it makes popping off clips and retainers much easier than with a screwdriver.
3. Wear a heavy long-sleeve shirt, full pants, covered shoes and gloves as we are dealing with glass.
4. Don’t push too hard when you are dealing with glass. If getting something to fit is too hard, you’re not doing it right. Step back and look at the situation again.
Make your car window replacement a piece of cake
by
Tags: