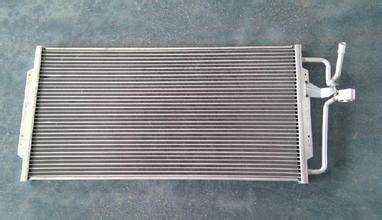
Graphene is made from carbon atoms arranged like a chicken wire. Such arrangement forms a very strong material. It is regarded as the super material of the future. Our car could benefit a lot if it was made from it or at least, some components of the car. So was for heat exchanger. Heat exchanger is required to work efficiently to keep your engine cool. Just like that in the radiator, it works by converting air or water to a certain temperature by making them pass through an agent. Since it is not made from graphene, and the harsh environment it works in, you can easily find a damaged heat exchanger under the hood. However, a heat exchanger replacement can be easily found in the market.
Buying a Heat Exchanger: What to Consider
Equipping your car with a heat exchanger is a good idea. Because this component has several automotive applications, the right aftermarket exchanger can improve fuel economy, decrease energy use, reduce overall engine temperature, and even reduce carbon dioxide emissions. Now finding the right product for your vehicle might be a bit tricky, what with all the options you have. To help you find an exchanger that will let you enjoy the said benefits, here are some of the factors you have to consider:
Material
As its name suggests, a heat exchanger will definitely be exposed to extreme temperatures and humidity. This is why an ideal one should be made of high-grade titanium, nickel alloys, stainless steel, aluminum, copper, or carbon steel. All these materials are known for their thermal conductivity, durability against extreme temperatures and fatigue, and thermal expansion capabilities.
Construction and design
Construction also plays a great role on how long a heat exchanger will last. To get the most out of your money, invest in an exchanger that is fully welded and features a compact design. A fully welded construction ensures durability throughout the years, while a compact design will make installation easier.
Type of refrigerant your car uses (for internal exchangers for the AC system)
If you’re buying an exchanger for your car’s AC system, another factor you should consider is the type of refrigerant your vehicle’s AC system uses. Two of the most common refrigerant types used today are the R134a and the R1234yf. When choosing an internal heat exchanger, make sure that it’s compatible with your car’s refrigerant type. Keep in mind that not all exchangers will work with all types of Freon.
Heat exchanger type
Depending on your car’s needs, you can install this component in the AC system, in the transmission assembly, or in your car’s exhaust system.
Now if you’re looking for an internal type, there are two main options depending on the type of your vehicle’s AC system: an expansion valve type and an orifice tube system. With an expansion valve type, the exchanger is most probably a separate component or a tube that’s placed inside another tube along with fittings attached to either ends. As for the orifice tube type, the exchanger is usually built into your vehicle’s accumulator. So before you buy an exchanger, make sure first that it matches your preferred vehicle application and your ride’s specs.
Car Maintenance: Replacing an Exhaust Heat Exchanger
n some cars such as the Porsche 911, a heat exchanger is installed in the exhaust system to help remove toxic gases from the engine and serve as an additional heat source for the car’s interior. Because of its location, however, it’s one of those components that have a huge tendency to rust. Over time, exposure to water, road salt, and other damaging elements will cause this pipe to corrode. And once this happens, you might not have a choice but to replace it. Fortunately, installing a new heat exchanger on a Porsche 911 is relatively easy as long as you have the right skills and tools. Here’s what to do:
Difficulty level: Moderate
Tools you’ll need:
Heat torch
Wrench
Heat exchanger barrel nut tool
New exhaust gaskets (optional)
Step 1: Locate the heat exchanger. In a Porsche 911, this component is usually attached to the exhaust heads. You can always consult your vehicle manual if you’re not sure about its exact location.
Step 2: Unbolt the old exchanger. Heat up the nuts that hold it in place with a heat torch to reduce their chances of breaking off. Keep in mind that these nuts can easily break off during the removal process because rust and heat have probably taken a toll on them. And once broken pieces of studs are stuck inside the access holes, installation becomes trickier. After heating up the nuts, place a removal tool through the access holes found on the surface of the exchanger to remove them. If the nuts fall into the tube, don’t worry since you’ll be removing and replacing the entire exchanger tube anyway. Once the nuts are removed, carefully pull off the exchanger from the exhaust assembly.
Step 3: Inspect nearby components for signs of damage. If there’s too much carbon buildup outside the combustion chamber and valves, your car’s air-and-fuel mix might be too rich. Replace or fix broken parts if needed.
Step 4: Install the new heat exchanger. Attach the new exchanger by following the exact position of the old one. Don’t forget to install new exhaust gaskets at the exhaust pipe end and exhaust heads. Bolt the nuts back in place to secure the replacement component in position. To prevent the nuts from rusting, coat them with anti-seize compound.

Heat Exchanger
by
Tags:

Leave a Reply